DocsSignatures
Designing a template
Start from a gallery design, set your brand, preview against real directory data, and go live.
Updated September 19, 2026
Designs are browsed in the portal under Gallery, and edited under Design — the Playground. A template belongs to one company; if your account has several companies (brands), the company selector at the top of the page decides which one you are designing for.
Start from a design
Gallery holds the catalog. Filter it by industry — legal, healthcare, energy, beauty, gaming and so on — and by style (animated or still). Each card previews with sample data.
- View opens the design full size. It changes nothing at all.
- Add to Playground creates a draft from that design and opens it for editing.
If you already have a draft from a design, the card offers Open in Playground instead, taking you to the one you built rather than making another. Add another is still there when you genuinely want a second version — the same layout in a different colour for a different department, say.
Every starter is a complete, tested signature; start from one rather than blank.
Note: Adding a design creates a draft. Your team's signature does not change until you go live.
The Playground lists this company's own drafts beside the editor, and your work saves as you type — there is no save-or-lose-it moment.
Set the brand
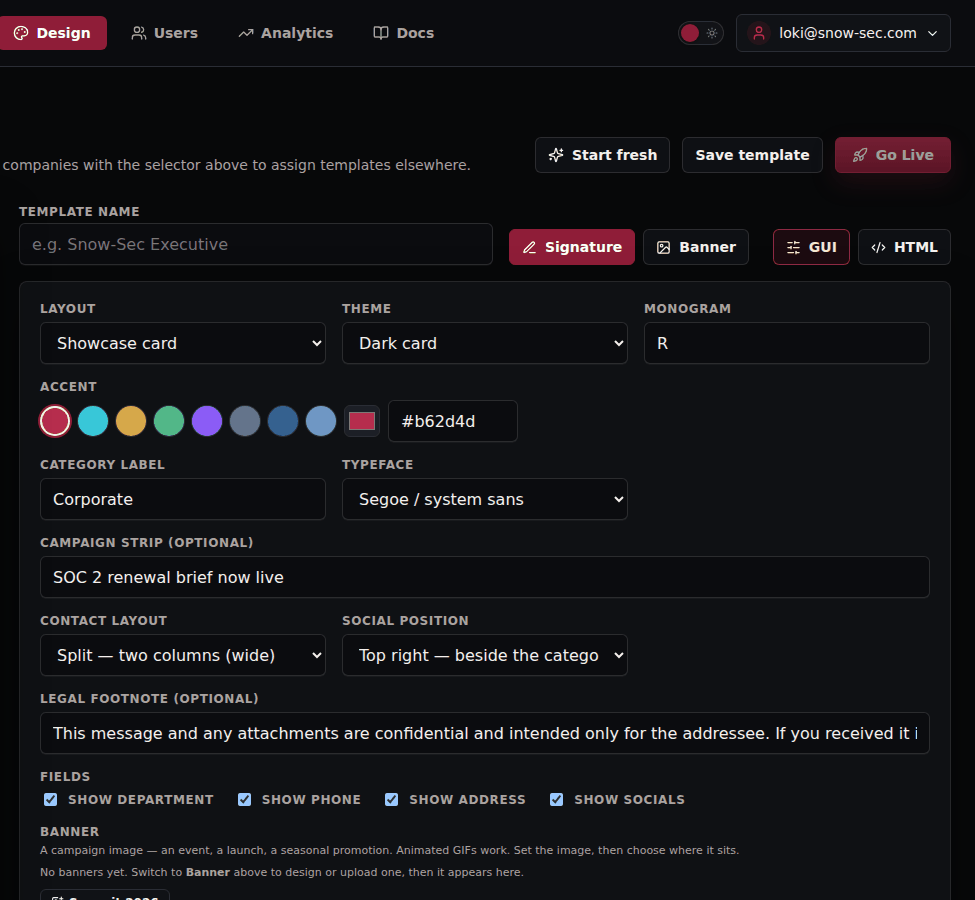
The Signature tab holds everything visual:
| Setting | What it does |
|---|---|
| Layout | The overall shape — showcase card, column, letterhead, plain |
| Theme | Light or dark card |
| Monogram | The letter in the mark, usually your initial |
| Accent | Brand colour, from the palette or a hex value |
| Category label | The small caption above the name — Corporate, Sales, and so on |
| Typeface | System sans, or the family your brand uses |
| Campaign strip | An optional one-line call to action under the card |
| Contact layout · Social position | Where phone, web and social icons sit |
| Legal footnote | Optional confidentiality or disclaimer line |
| Fields | Which directory fields appear — department, phone, address, socials |
Switch to GUI for controls or HTML to edit the markup directly. The two stay in sync.
Preview with real data
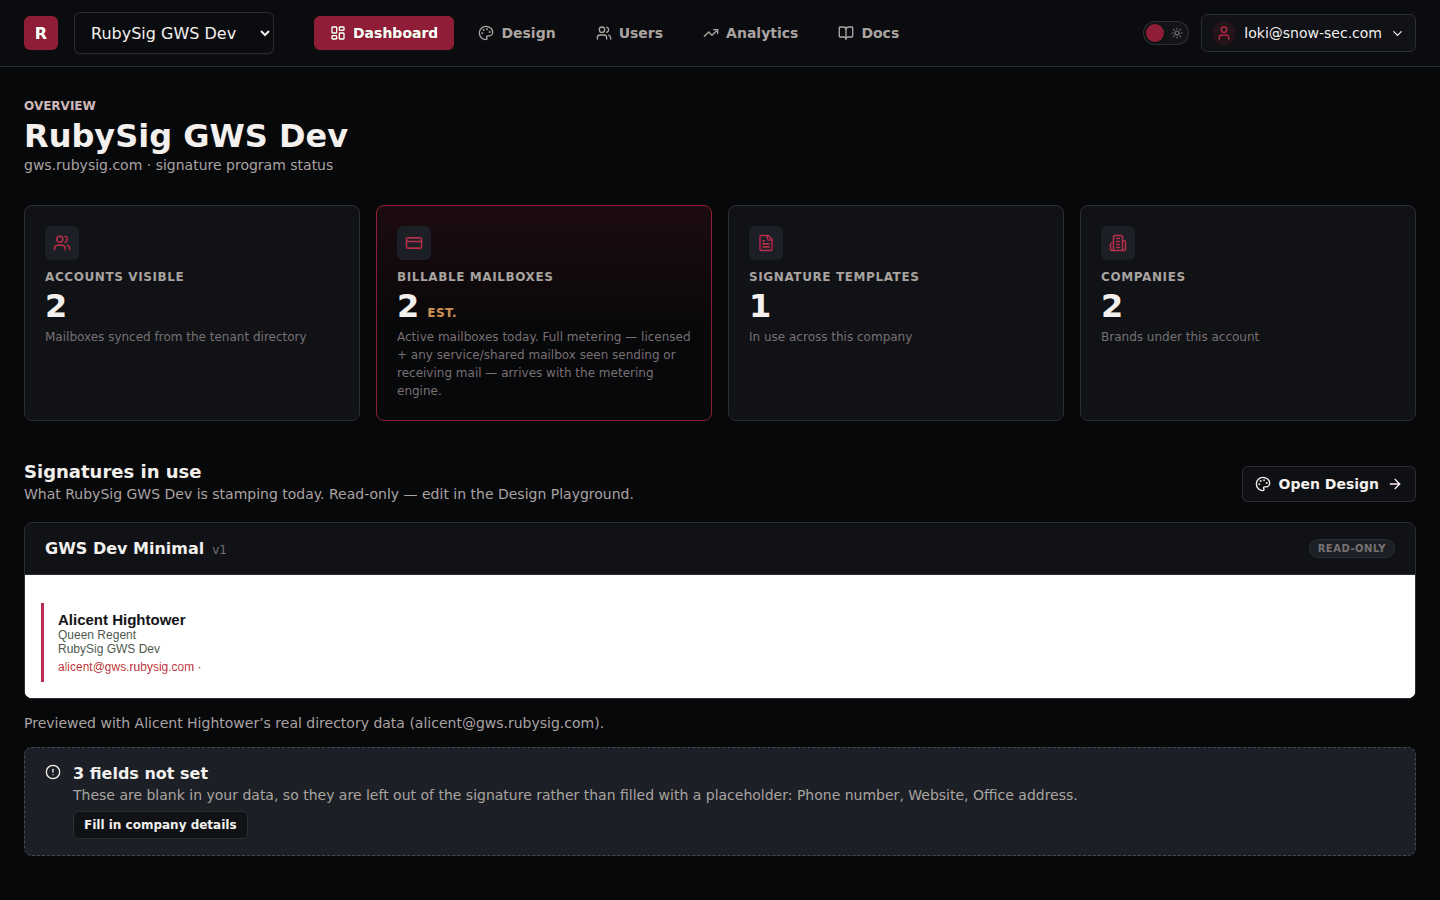
The preview renders with a real mailbox from your directory, not lorem ipsum — so you see exactly what a given person's signature will look like, including the fields that are empty for them. A field with no value is dropped cleanly: a person without a phone number gets no Phone label, not a blank one.
The dashboard shows the same thing for the template that is live today, and lists any fields that are blank across your data so you know what to fill in.
Save and go live
Drafts save automatically as you edit. Go Live makes the open template the signature RubySig stamps for this company from the next message on — there is nothing to push to users and nothing to install.
Important: editing the design that is currently live does not change your outbound mail as you type. The Playground makes a copy and you edit that, so a half-finished change can never reach a recipient. When the copy is ready, press Go Live to publish it. Until you do, your team keeps sending the previously published design.
Tip: Keep one template live per company and iterate on copies. Going live is instant; so is going back, by making the previous template live again.
Banners
A time-boxed banner under the signature — an event, a launch, a notice — is designed on the Banner tab. See Banner campaigns.